Galleria Romanelli, Working Plaster
After a plaster cast has been made from the mold there are almost always things that need to be worked on to give the final plaster cast a good look. The more care you take earlier in the process by popping air bubbles and designing the mould properly will save you some work, but there will normally be issues that are unavoidable that need to be worked on in the plaster cast. For example on the Owl sculpture, due to the shape of the wings when, working in clay they needed to be thick enough the clay would not break or bend, but when working in plaster which is much stronger it is possible to have the wings thinner and overlapping. If you are going to try and eventually get a bronze made, I would recommend making a plaster cast, and cleaning up all possible defects in plaster, and then making a final mold to be sent to the foundry. This is more expensive, as you will have to make 2 moulds, but it will save you having to clean up the wax mould each time you want to have another bronze cast and reduces your workload considerably. If you are sure you will only want one bronze cast you may choose to skip this step.
The rough cast, ready to have finishing done. The seal between the two sections of the mold must be cleaned up.
You will normally have a line running through your plaster cast from where the sides of the mould met. This line can be trimmed with a knife and then smoothed over lightly with sandpaper to blend it.
This section of the wings was to fragile and waterlogged to due in clay. I had to join the edges with clay to make sure it did not break off. Now in plaster I am able to clean up this area and get the look I originally wanted.
It is best to get rid of all air bubbles when pouring the silicone for the mould, but sometimes due to the the design or shape of the sculpture this is unavoidable. Now in the plaster version I will have to remove each bubble individually between the leg feathers.
When getting the sculpture ready for mould making, I had to seal up the eye sockets so the mould could be made. Now I have to re carve the eye sockets and smooth the shape of the eyelids.
Now that I am working in plaster, which is a much harder material I am able to clean up the section between the overlapping wings to get the look I originally had wanted.
The plaster plugs removed from eyes and between the legs returning the plaster model to the original shape of the sculpture
A clay wash is added over the tree branch to give a bit of contrast. Little things like this can add interest to a plaster cast. It did not take long to do, but made the piece look more interesting.
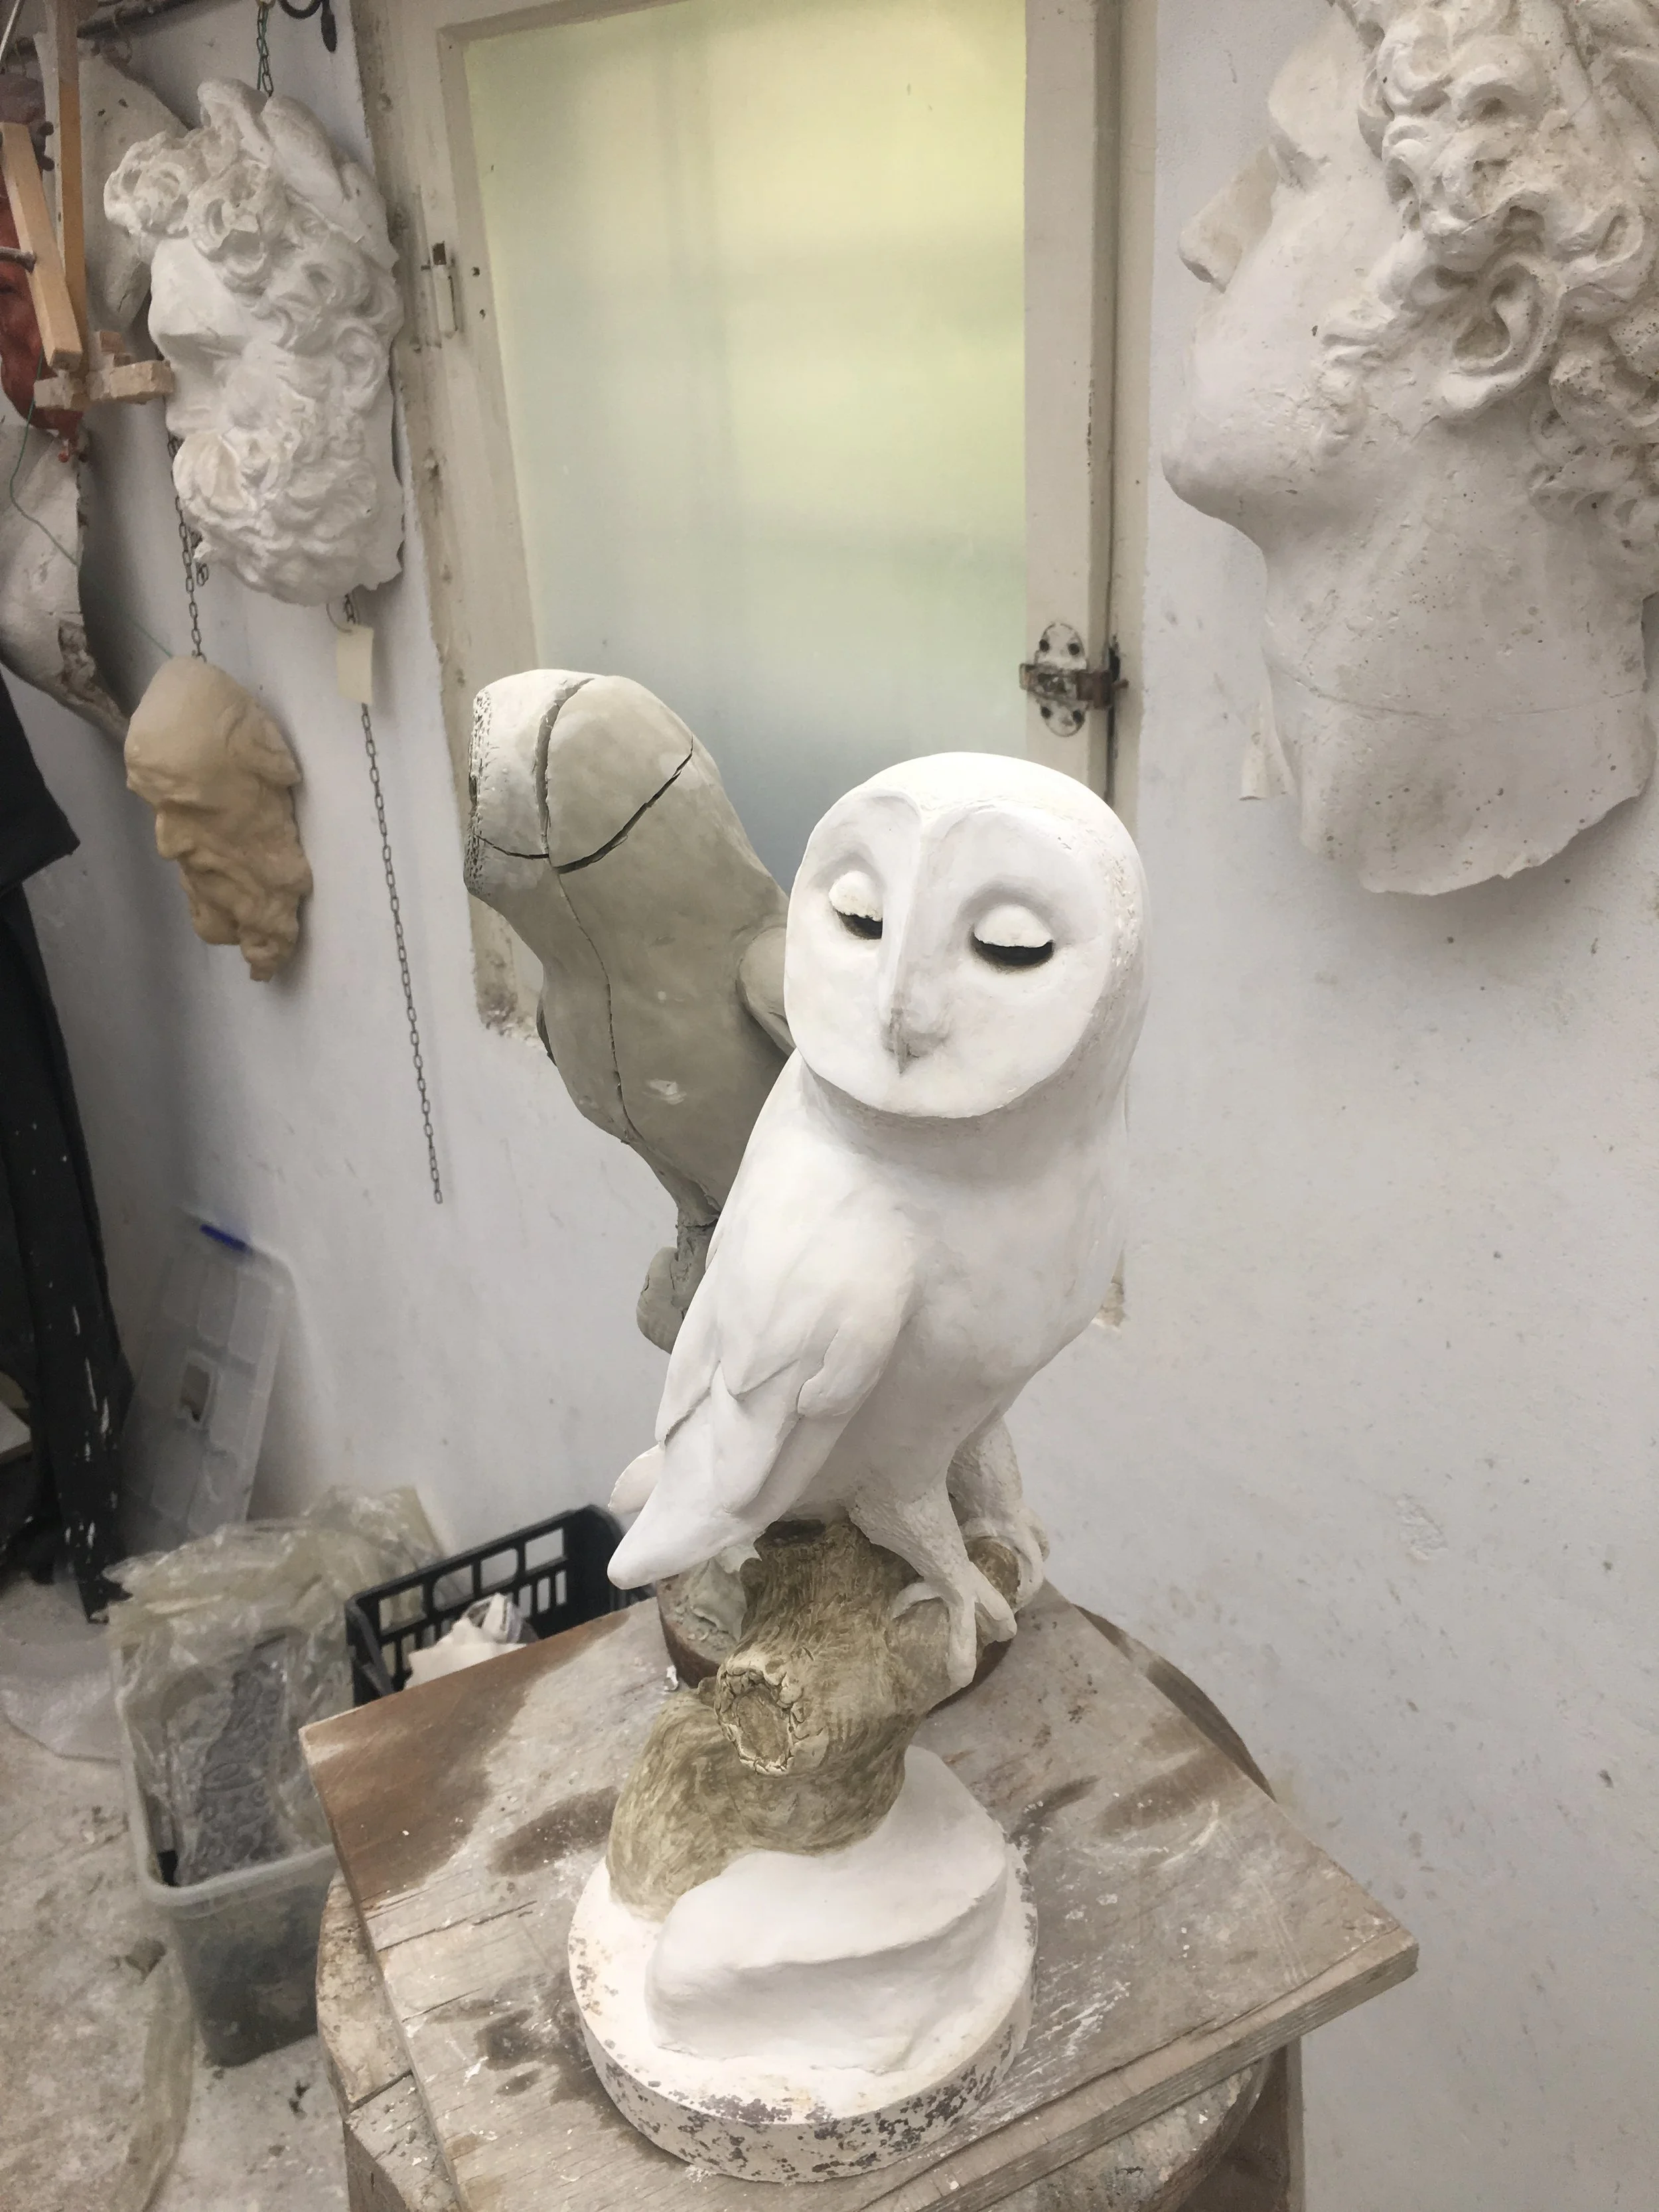
Here the finished plaster cast can be seen next to the original clay one. You can see here what happens to a clay sculpture if not preserved, the clay will shrink and especially if it was built on an armature, cracks will develop. Clay must either be fired into terracotta (which is not possible when using an armature) or moulded and cast in plaster to be permanent. Once you have the mould you can make more copies or send it to a foundry to be cast in bronze.
Finished plaster version with clay original in background. the center cut is from cutting the mold in two and can be repaired in clay if desired.


